One of the most popular posts on Artistcoveries was written in 2019: Developing New Skills – Cross Contour Lines. Now, many years later, it is still being viewed daily, amassing a total of more than 10,000 views since it was first published. Obviously it’s a well-searched topic for Google.
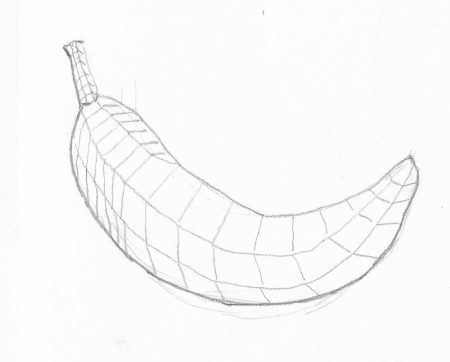
As one of my art lessons today, I reviewed the principles of cross contour lines and how they help us create more realistic drawings. The featured image shows a simple line drawing of a banana with cross contour lines added.
But… what now? After reviewing this lesson and completing my “Cross-Contour Banana” I found myself asking a lot of questions, and I didn’t really have all the answers. It wasn’t enough to say that “cross contour lines” are helpful. I needed to understand exactly how these added lines are used.
Do we add “cross contour lines” to every drawing we make? Or is it enough to just know and understand the concept, perhaps visualizing these cross contour lines in our head? And if we do add them to a drawing — just as in my banana illustration — what excatly do we do with them?
Maybe I was being particularly obtuse today, deliberately refusing to fully grasp the idea of using cross contour lines in art. I do this sometimes. It leads me to browse around, to do online searches, to seek out more information, and hopefully, enables me to better understand a particular concept in art.
I began by asking a fundamental question: Precisely how do cross contour lines help us create more realistic drawings? I read a lot about using cross contour lines for shading, for creating more realistic color applications, to see where to create strong contrasts in a drawing. Great. Fine. That’s not what I’m looking for. I’m not really wanting to know more about what cross contour lines help us do, but more of the actual techniques for HOW we can use them.
I rephrased my question: What am I supposed to do with all those cross contour lines? As I approached the subject from this point of view, I began to see the reasoning behind creating these “topographical maps” of various objects.
Essentially, cross contour lines serve a very valuable purpose by helping us uderstand where and how to shade an object. Contour lines are used to reveal the form and volume of that object, in my case, a banana. I can look at this “map” I’ve created and read a great deal of information.
Curvature
I can look at my cross contour drawing and see how the banana curves, not just the essential outline curves — the two dimensional aspect of its shape — but how it curves across its surface. This knowledge helps me see depth more clearly. Curved areas closer to the viewer will be darker and more detailed than those farther away.
Planes
Using cross contour lines enables me to see the distinct planes or faces of an object. Here I can see that there are four distinct planes. This is important, because each plane will reflect light in a slightly different way.
Values
A good contour line drawing helps us see where to apply values. Just as with a geographical “topography” map, lines closer together show steeper or more dramatic changes — which, in art, translates to “darker values”. Lines that are farther apart represent gradual changes or “lighter values”. Understanding this lets me quickly see where to place different values, whether I’m working in color or black and white.
Details
Although there aren’t any significant blemishes or other details on this particular banana, use of cross contour lines would quickly point out places where notable details did exist. These would then be correctly drawn and shaded by following the “guide” provided by the cross contour map.
I printed out a copy of my drawing and set to work following my cross contour lines as I added shading. I did this first in a rather rough, loose way.
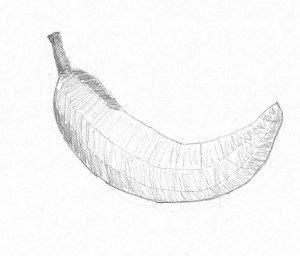
Finally, I gave a little more attention to the shading/blending process and smoothed it all out a bit. Because I was working on a copy, I couldn’t erase the original lines, so they’re still visible. I realized at once how easy it was to see what directions my pencil strokes should go. I could tell what areas needed to be darker and which areas should be lighter.

For me, this was a great exercise, not just reading and learning but giving myself actual “hands-on” practice at using cross contour lines. Even though my illustration is still a bit rough, I can see how much more realistic our drawings can be when we’re aware of the “cross contours”.
So, do we need to draw these lines in on every drawing or painting? No, of course not. Sometimes simply observing an item will be all we need to see the various planes and curves and values and to note specific details. At other times, we might find it helpful to make a “supplementary” drawing — a rough sketch on which we can add cross contour lines to reveal all the information we need. And there may be times when we do want to include those lines — very lightly — as we work on a drawing.
I’ll probably use cross contour lines frequently now, both as I’m working on geometric forms for my 100-Day Project, and as I draw more pears! Both subjects are perfect for the cross contour line technique.
All in all, it’s been a good day here in my art studio. I feel I have learned a lot — not only about the WHY of using cross contour lines, but also about the HOW. I hope you find this information useful, too.

Wow! Those cross contour lines help so much!
LikeLiked by 1 person
Yes, they really can be helpful!
LikeLike